How to create a server
Estimated time to read: 2 minutes
In this tutorial, you will learn how to create an instance (server) through the Fuga Cloud dashboard or OpenStack CLI.
Prerequisites
For this tutorial you’ll need the following:
- A Fuga cloud Account
Create the server
- Navigate to Compute
- Click on Create instance +
You will now see a screen that shows the instance creation page.
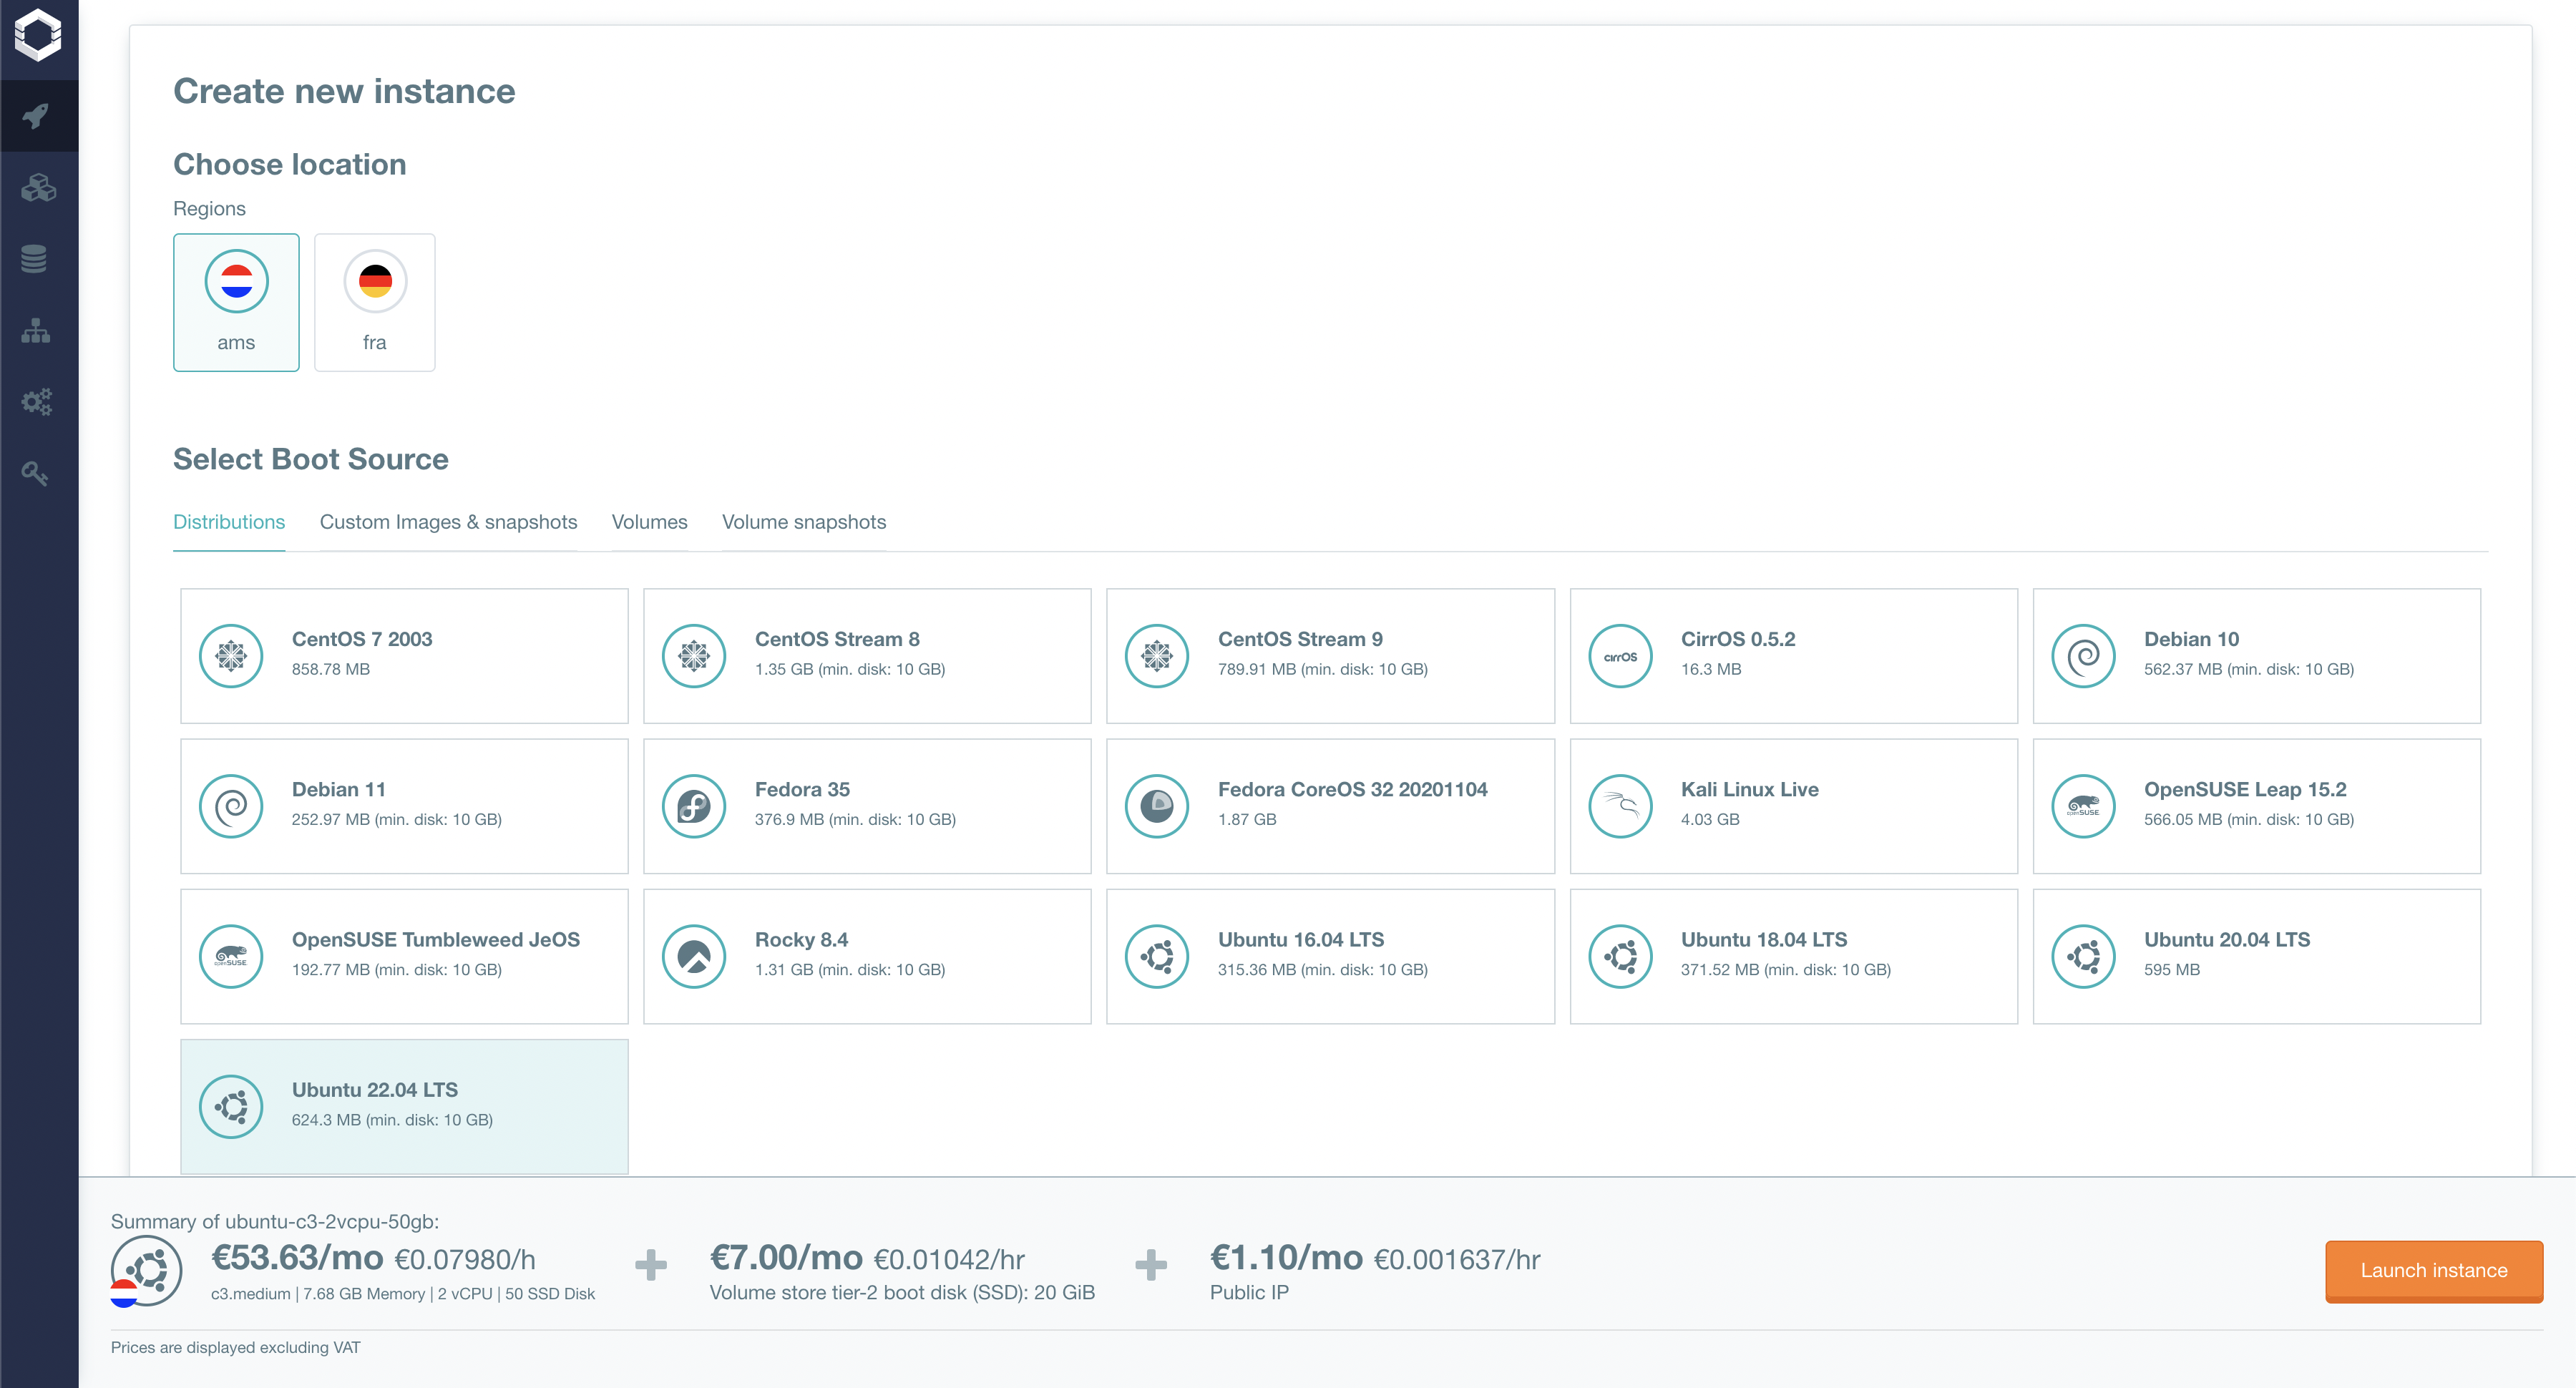
On this page we will configure the instance: 1. Select the region 2. Select an operating system 1. or use a custom image 2. or use a volume 3. or use a volume snapshot 3. Choose to use ephemeral storage or a boot volume (Volume storage is a bit slower, but has a redundant setup (n+2) to prevent any loss of data). 4. Choose a flavor 5. Choose a network 1. with public you will get a public IPv4 2. with public6 you will get a public IPv6 6. Choose a key pair to access the server after creation. 7. Select the security groups you require for this server. 8. Set a name for the server.
After that you can find the pricing of the server per month at the bottom of the page and right to that you can create the instance by clicking Launch instance.
To create a server with the CLI tools it is required to first gather the image ID, flavor ID, network ID(s), security group(s) and key pair
This can be done with the following commands:
- List images
- List flavors
- List networks
- List security groups
- List key pairs
Then with all the information gathered it is possible to create a server.
Note
Repeat --network <network_id> and --security-group <security_group_id> for adding multiple.
List the server
- Navigate to Compute
- Click on the instance you just created
Now you can find the specification of your instance:
- Status
- ID
- Name
- Attached volumes
- Initial key pair that has been used to create it
- IP Addresses
- Ports, with their security groups
- Flavor