How to use Ansible to deploy an Instance as a LAMP server for Ubuntu 20.04
Estimated time to read: 6 minutes
This tutorial describes how to use Ansible to automatically create, deploy and configure an Ubuntu-based Fuga Cloud instance with Apache, MySQL, and PHP.
Prerequisites
For this tutorial you'll need the following:
- A Fuga Cloud account
- A Linux machine (either an instance on Fuga Cloud or your local workstation) capable of running Ansible
- An SSH key known by the Fuga Cloud API
- A downloaded copy of your openrc.sh file
- The CLI tools installed
In this tutorial, we'll assume an Ubuntu / Debian derived Linux distribution. With small changes, the commands should be compatible with any Linux flavor. What is Ansible?
Quote from the Ansible.com website:
Ansible is a radically simple IT automation engine that automates cloud provisioning, configuration management, application deployment, intra-service orchestration, and many other IT needs.
Ansible is comparable with Puppet, Chef, and SaltStack (among others). Ansible is, however, the easiest to get started with as it simply runs through ssh instead of a custom agent. This can make it more difficult for larger setups and/or more complicated configurations.
An Ansible playbook consists of some playbook information and a set of tasks. The format is YAML. A basic playbook looks like this:
- name: <Name of playbook>
  hosts: <A list of hosts to run the playbook on>
  gather_facts: true or false.
  tasks:
    - <task1>
    - <task2>
    - <task3>
    - etc.
And the format of a task is:
Please note that YAML is indentation sensitive. Meaning that wrong indentation can lead to non-runnable playbooks or wrong usage of variables within a playbook.
Step 1: Installing Ansible
The first thing we'll need is Ansible:
Next, we'll need to load the OpenStack variables into the environment. Please make sure to provide the correct password when asked.
Finally, we'll create a directory to put our Ansible playbooks:
Step 2: Creating an Instance on Fuga Cloud
Now that the setup is complete, we want to create a playbook to create an instance on Fuga Cloud. We are going to assume the following for our example:
  Image: Ubuntu 20.04 LTS
  Hostname: lamp01
  ssh keyname as known within Fuga Cloud: MY_SSH_KEY
  size: c3.small
  network: public
You can find other images through the dashboard or using the OpenStack CLI tools using:
First, we'll define our instance deployment playbook. Create a file within the ~/ansible directory called deploy.yaml and enter the following playbook:
- name: Deploy on Fuga Cloud
  hosts: localhost
  gather_facts: false
  tasks:
    - name: Deploy an instance
      os_server:
        state: present
        name: lamp01
        image: Ubuntu 20.04 LTS
        key_name: MY_SSH_KEY
        wait: yes
        flavor: c3.small
        network: public
        meta:
          hostname: lamp01.localdomain
You can find your SSH Keys using the OpenStack CLI tools using:
Pay close attention to the indentation. Save the file and quit the editor. Now run the following command from within the ~/ansible directory (make sure your openrc.sh environment variables are set).
The output should look similar to this:
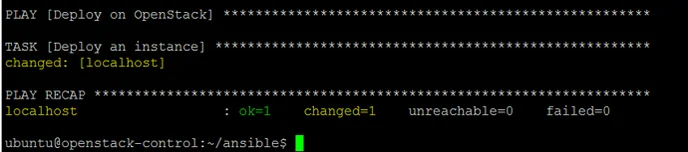
The deployment can take a couple of minutes to complete. After the deployment, we need to make sure the server is reachable on its hostname through ssh. You can set up DNS for the instance or we can add it to our hosts file. A simple oneliner for adding the server to the hosts file:
openstack server list | grep lamp01 | awk {'print $8 " " $4'} | sed -e 's/[^ =]*=\(.*\)/\1/' | sudo tee -a /etc/hosts
Or, look up the IP in the dashboard.
Step 2a: Allow ssh access
To be able to access the server, it is required to allow port 22 within a security group on the instance, see our security groups tutorial.
Step 2b: Configure ansible
Lastly, we need to add the hostname to Ansible’s config file. Open the file /etc/ansible/hosts and add the following:
Now we'll need to fix some dependencies for Ansible to be able to fully manage the new instance.
Create an Ansible playbook. We’ll call it setup.yaml:
- name: Setup ansible needed things.
  hosts: all
  gather_facts: no
  tasks:
     - name: "Update repository cache and Install Python 3 needed for running Ansible."
       raw: sudo apt update; sudo apt -y install python3-simplejson
Ansible needs Python 3 with simplejson before it can do its things. The above playbook will install it. To run it, execute the following command:
This can again take about 15 to 30 seconds. You should get asked to approve the SSH Key Fingerprint of the server. If, for some reason, it gives an error, the first thing to check is if you can ssh into the new instance on the hostname you specified in /etc/ansible/hosts.
Your output should look similar to this:

Step 3 - Making it a LAMP server
Now we'll make some playbooks to set up a LAMP stack. Setting up Apache 2 and PHP 5 is easy. But we also want to create a bit more structure. So let's start with creating an Ansible/roles directory where we can put tasks file specific for certain roles.
Next, we’ll create the apache role file. Open the file ~/ansible/roles/apache.yaml:
Paste in the following YAML config:
- name: install apache & php
  remote_user: ubuntu
  hosts: all
  become: true
  become_user: root
  gather_facts: true
  tasks:
    - name: "Install apache2"
      package: name=apache2 state=present
    - name: "Install apache2-php"
      package: name=libapache2-mod-php state=present
    - name: "Install php-cli"
      package: name=php-cli state=present
    - name: "Install php-gd"
      package: name=php-gd state=present
Next, we'll do the same for MySQL. Don't forget to replace the MySQL root password!
- name: Install MySQL for production ready server
  user: ubuntu
  hosts: all
  become: True
  become_user: root
  vars:
    MySQL_root_pass: ReplaceWithYourPassword
  tasks:
    - name: Set MySQL root password before installing
      debconf: name="mysql-server" question="mysql-server/root_password" value="{{MySQL_root_pass | quote}}" vtype="password"
    - name: Confirm MySQL root password before installing
      debconf: name="mysql-server" question="mysql-server/root_password_again" value="{{MySQL_root_pass | quote}}" vtype="password"
    - name: test1
      apt: package={{ item }} state=present force=yes update_cache=yes cache_valid_time=3600
      when: ansible_os_family == "Debian"
      with_items:
        - mysql-server
        - mysql-client
        - python3-mysqldb
    - name: Deletes anonymous MySQL server user for localhost
      mysql_user: user="" state="absent" login_password="{{ MySQL_root_pass }}" login_user=root
    - name: Secures the MySQL root user
      mysql_user: user="root" password="{{ MySQL_root_pass }}" host="{{ item }}" login_password="{{MySQL_root_pass}}" login_user=root
      with_items:
        - 127.0.0.1
        - localhost
        - ::1
        - "{{ ansible_fqdn }}"
    - name: Removes the MySQL test database
      mysql_db: db=test state=absent login_password="{{ MySQL_root_pass }}" login_user=root
Last, create the LAMP role file. This file will include our Apache & MySQL roles:
- name: install LAMP Stack
  hosts: all
  remote_user: ubuntu
  become: true
  become_user: root
  gather_facts: true

- name: Include Apache
  import_playbook: apache.yaml

- name: Include MySQL
  import_playbook: mysql.yaml
Finally, we'll run the playbook:
You should have output similar to:

That's it! You now have a LAMP server with Ubuntu 20.04, Apache 2, MySQL and PHP 5 ready to go.
Conclusion
In this tutorial, you’ve installed Ansible and used it to automatically create, deploy and configure an Ubuntu-based OpenStack instance with Apache, MySQL, and PHP. You learned how to create an Ansible playbook and became more familiar with the YAML format.
Don't forget to set the right security groups for your server (only the default policy is added during creation). Otherwise, the web server might not be reachable.