Getting started with Fuga Cloud
Estimated time to read: 12 minutes
This getting started, contains the basics on getting started with the Fuga Cloud dashboard.
Introduction
Fuga Cloud offers a user-friendly dashboard that gives you access to all the Fuga Cloud OpenStack services. The dashboard enables you to manage all your projects within Fuga Cloud. The dashboard gives you easy access to your instances, volumes and lets you easily configure your networks and routers. This tutorial gives you an overview of the basic functionality.
In 4 short chapters we'll introduce you to Fuga Cloud and help you with launching your first instance.
- Logging in to the dashboard
- Configure secure access for instances
- Create a cloud instance
- How to log in to your instance
Log in to the dashboard
- The Fuga dashboard can be found at: https://my.fuga.cloud
- Enter your credentials at the login page to login.
- At this moment it isn't possible to change your avatar, there is a connection with gravatar.com though
The dashboard
The dashboard contains various functions, below is the structure of the dashboard explained through clickable cards. Here you can find basic information about each section of the website.
The sidebar menu

Compute
From this tab, you can connect to your instances through virtual network computing (VNC). The instance tab shows you the instance’s name, it’s public IP addresses, associated key-pair, power state, size and status. Further, actions include the ability to create snapshots, edit, resize, pause, reboot and much more.
EMK - Kubernetes
The EMK (Enterprise Managed Kubernetes) tab allows you to create or manage Kubernetes clusters. Once a cluster is created, information about the cluster state, nodes can be inspected all in a single place. A specific cluster can be managed into more detail by clicking the cluster name.
Also it is possible to manage the service accounts for the EMK api here. With this it is possible to create and managed EMK clusters through Kubernetes CRD's.
Storage - Object Store
The Object Store offers a highly scalable low-cost storage solution. Here you can create and manage your Object Store containers.
Storage - Volume Store
In the volume store tab, you can create, view and delete volumes. Volumes are block storage devices that you attach to instances to enable persistent storage. You can attach or detach a volume at any time. You are also able to create a snapshot from a volume.
Storage - Images
Launch instances from images and snapshots view images and instance snapshots created by users. There are public images available that you can use to create your own images. After clicking on an image you can find some details like size, status, format etc.
Storage - Snapshots
With a snapshot you can create a state of a system at a particular point in time. It can be used to restore an instance to that state, clone an instance, or migrate an instance.
Network - Network topology
in this topology tab you'll have an overview of the network that are attached to your instances. You can see two different types of networks, Public (IPv4) and Public6 (IPv6)
Network - Networks
The network tab allows you to see a visual representation of your OpenStack network topology. In this tab, you are able to create and manage your public and private networks as well as create ports that can be attached to devices.
Network - Ports
You can create a port that can connect to a single device, such as a NIC for a server, to a network. The port also describe the associated network configuration, such as a MAC address and IP address.
Network - Routers
With routers you can create your own Virtual Local Area Network (VLAN). This allows you to separate your environment. You can use them to connect different networks, and forward the traffic between those networks.
Network - IP addresses
You can allocate an IP address to a project in this tab. Unlike the state of the instances, floating IP addresses are able to have their connections modified at any time.
Network - Security Groups
A security group acts as a virtual firewall for instances and other resources on your network. Here you can view, create, edit, and manage your security groups and security group rules.
Network - Load Balancers
Load Balancers let you distribute traffic between multiple instances and are a good way to horizontally scale your app. When creating a Load Balancer a network can be selected and instances within that network can be added to the balanced pool. Different methods of balancing can be selected. Additionally, monitoring can be deployed.
Service - DNS
Connect to your websites using domain names instead of IP addresses. You can request to add domain to DNS by filling out this easy form. We will check your domain manually. After the check, we will email you to let you know your domain is added.
Access - Key Pairs
Each project should have at least one SSH key pair, here you can view, create, edit, upload and delete your key pairs. Once a pair has been created, it can be used for authenticating with (multiple) instances and Kubernetes clusters.
Access - Credentials
Application credentials provide a way to delegate a user’s authorization to an application without sharing the user’s password authentication.
Access - Credentials
In the credentials overview you can create and manage credentials for OpenStack environments and EC2 / S3. Respectively you can use those to create resources through our OpenStack API or the object store.
Access - API Endpoints
View your API endpoints.
The top bar

The rocket icon
The rocket icon gives access to quick actions to do in the Fuga Cloud dashboard
The teacher icon
The teacher icon gives access to tutorials and other useful information.
The bell icon
The bell icon is where notifications and messages are shown.
The usage
Here you can find the current usage of this month for all your teams. Clicking will direct you to the billing details page.
The profile menu
Below you can see an example of your profile menu. Here it is possible to find your teams to switch to, profile, teams, billing details and the logout button.
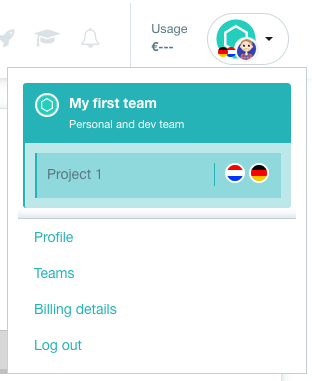
Team - My first team
Here you can see that the Project 1 environment of the team My first team is selected. The flags shown in the right, show which regions are currently visible in the region. Clicking on one of those deselects that region.
Profile
Under your profile you can find and edit your user information.
Teams
Under your teams you can find all information about all your teams, a team's cloud environments and EMK projects.
Also it is possible to manage the team users from here.
Billing details
Under billing details you can view the current usage for this month, billing details, payment methods and previous invoices.
Configure secure access for instances
In this chapter we explain what a security group is and how you can create IP filter rules, this way you can grant SSH access to your instance (virtual machine).
SSH (Secure Shell) offers an encrypted, secure connection over an unsecured network (internet) for client-server communication. In other words, log in to your instance remotely.
Security Groups
Before you launch an instance, you have to configure a security group. A security group acts as a virtual firewall and is a container with a set of IP filter rules which specifies what traffic has access to which port. For example, you can make SSH access and ping traffic available on your instance.
Add rules to the default security group
In this example, we are going to add some IP filter rules to the already existing default security group. Of course, you can create a new security group for this. It is possible to add several security groups to your instance.
Before you can access an instance by SSH and ICMP (ping) you need to apply some rules to all instances within a project. You always need to set up the following unless there is a particular reason to prohibit SSH or ICMP access to an instance.
- From your project in the dashboard go to the Networking tab and click Security groups.
- You can see the available security groups for this project.
-
Click Manage Rules and then Add Rule.
-
We advise you to leave the Default alone and create your own rule and pair both.
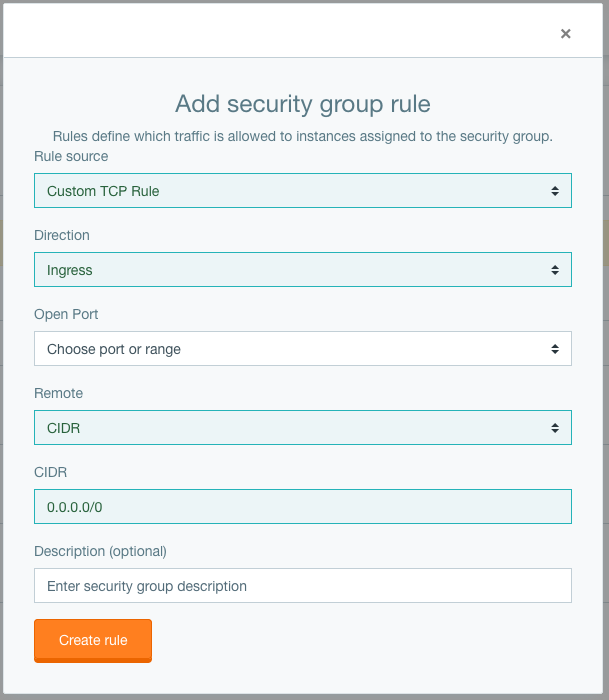
Enable SSH
To enable SSH access fill out the following:
- Rule source: SSH
- Remote: CIDR
- CIDR:
0.0.0.0/0
Enable ICMP
To add ICMP (ping) access fill out the following:
- Rule source: ALL ICMP
- Remote: CIDR
- CIDR:
0.0.0.0/0
Key Pairs
A key pair, also known as an SSH key, consists of two keys; a ‘public key’ and a ‘private key’. The private key is only for you and should not be shared with anyone. Your public key is inserted into your instance(s) when first deployed.
The public key ensures that all traffic, from and to your instance, is encrypted via SSH. This encryption can only be deciphered with your private key. If you want to log in to your instance remotely via SSH, your private key will decrypt the traffic so that you can talk to your instance. Because the traffic is encrypted, it is not possible to eavesdrop (man-in-the-middle attack) or to guess your password through brute force. This makes SSH the most used and safest way to log in remotely.
Each project should have at least one key pair. You can use a key pair for multiple instances at the same time. If you already have a key pair or created one with another tool, you can import that key pair. After this section, you should be able to import or create a key pair and add or create security groups.
Create a new key pair
If you wish to use a new key pair for your OpenStack platform, follow the steps below:
- Navigate to the Access tab and click on Key Pairs.
- In the key pairs tab, please click on the button Create Key Pair.
- Give your key pair a name and click on the button Create Key Pair.
- Your browser will save your
<name>.pemfile, (depending on your browser it will prompt you for saving) save this file on a secure place on your machine. - Your key is created.
Upload an existing Key Pair
If you wish to use an existing key pair, follow the steps below:
- Navigate to the Access tab and click on Key Pairs.
- Click on the button Upload Public key.
- Give your key pair a name.
- Paste your public key in the Public Key field.
- Click on the button Upload public key.
Create a cloud instance
In this chapter we explain how you can create an instance with ephemeral storage or a bootable volume, and how you can add and change the security groups of an instance.
Before you create an instance, you need to know what type of storage you want to use. You can configure an instance to use ephemeral storage or persistent volume storage. If you want to know the differences between these two, click the following link: How to choose the right OpenStack Storage. Fuga Cloud account
Creating a Persistent Volume
For creating a persistent instance, you need to create a bootable volume.
- Log on to the OpenStack dashboard and choose your project.
- Click Storage followed by Volume Store.
- Select Create Volume
- Specify your new Volume name.
- Select Image from the Volume Source drop-down list.
- Image source: Choose the image you like to use.
- Size: The minimum capacity for a Linux bootable volume is 10 GB. Windows bootable volumes need at least 30 GB.
- Click on Create Volume or Add extra storage to instances.
Creating an Instance (Ephemeral or Volume storage)
- Log on to the dashboard.
- Click on the Compute tab and select Instances.
- Click on the button Create Instance.
- Choose a Location for your instance.
- Select a Boot source. Distributions, custom images, volumes (previous paragraph) and volume snapshots can be used as source.
- If distribution or custom image is selected as boot source, the boot disk size has to be defined OR ephemeral storage can be chosen.
- Select the right Flavor for your instance, based on your requirements.
- Select a Network. Public6 for ipv6 and Public for ipv4.
- Add or create a Key pair. The pair created earlier can be used.
- Provide the desired Security Groups. The group created in the previous part can be used to allow SSH and ICMP traffic.
- Finally, you can choose a custom Hostname or the field can be left default.
- Click the button Launch instance.
Your instance with either a bootable volume- or ephemeral storage has now been created, and you can see it directly in the Instances tab. A public IP address is assigned to your instance.
If a distribution was picked as boot source, the newly created volume for this distribution is visible in the Storage > Volume store tab. You will see that a volume has been created with the desired size, linked to the instance.
Adjust security groups of an instance
If you did not select all security groups during the launch of your instance, or if you want to add additional security groups later, you can easily do this by performing the following steps:
- Log in to the dashboard.
- Click on the Compute tab and select Instances.
- Click on the Instance name you'd like to edit security groups for.
- Within the Security groups tab new groups can be added by clicking the + button, or existing groups can be modified by clicking on the group name.
- When adding a new security group a tab opens, and you can select a custom group that you created before. (leave the default and also pair your own)
- To confirm the addition submit the form by clicking the orange ✓ button.
How to log in to your instance
In this chapter we explain step by step how to log in to your instance.
Note
For most new images the username is the distribution name with lowercase, for example, Ubuntu 18.04 is ubuntu, and Fedora 27 would be fedora.
Connect to a Linux instance with an imported Key Pair
Open your terminal and type one of the following commands to connect to your instance. Which command you execute depends on the Linux distribution that you've picked.
Specifying the SSH key
If you want to use a specific SSH key, you can add -i <path_to_ssh_key>. For example with logging into Ubuntu:
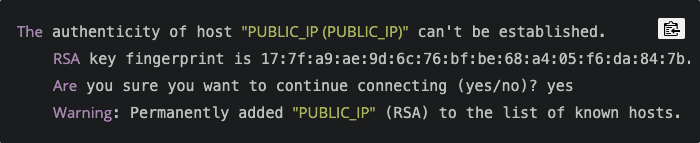
Pop up
When confronted with the following warning about adding a new host to you known_hosts file, you can select yes. As you have not earlier connected to this new instance, you get a message to put it in a trust file.
Connect to a Linux instance with a generated Key Pair
- Download your key pair (.pem) locally, for example to your .ssh folder.
- Open your Terminal.
- Navigate to your earlier stored .pem file.
- Run the following command to protect your key pair file. (Mandatory)
- You are now able to connect to your Linux instance with the following command:
- If your instance is Ubuntu:
- Other operating systems often use the name of the OS as the user account. For example: Connecting to Fedora and CentOS instances can be achieved by substituting '
ubuntu' user from the command with 'fedora' or 'centos' respectively.
Conclusion
In this getting started series, consisting of 4 chapters, we introduced you to the dashboard, security groups, key pairs, launching an instance, linking a public IP address and logging in to your instance. With this knowledge, you are ready to follow the other tutorials in the Fuga Cloud Academy.
In a quick recap, you learned the following:
-
Logging in
Getting to know the dashboard and to find what and where.
-
Configuring access
At Fuga Cloud each instance cannot be accessed from the outside, unless you make a rule for this. This helps with securing your instance. So now you have added an IP filter rule granting SSH access (port 22) to instances configured with your security group. You also created or uploaded a key pair. This will be used later on for instance authentication.
-
Creating an instance
At Fuga Cloud there are many flavors and configurations to be made with your instance, this one learned how to configure your first instance and launch it. This instance was either configured with ephemeral or volume storage.
-
Accessing the instance
Here we learned you how to log into the created instance from the previous chapter. Now you can deploy your own software at Fuga Cloud.
If you have feedback about this getting started series, we would love to hear from you. For this, you can use the chat functionality on https://fuga.cloud.
We hope you enjoy all your future projects on Fuga Cloud!